


Corn-Free,
Dairy-free,
Fermentation,
from scratch,
kid approved,
Little Kids in the Kitchen,
Mason Jars,
probiotic,
Wheat-free
Probiotic Soda! Strawberry Water Kefir Project
10:44 AM
During the holidays my youngest got hooked on "bubble juice" (Sparkling Grape juice that we got to celebrate birthdays and the new year). And I thought "Hey! I know how to make this healthier... and how to give us a late winter project to keep us busy!"...
I sent away for some water kefir grains on Amazon and they arrived... a little underwhelming. They were dehydrated and took a good 3 weeks to get going well enough to make "bubble juice". BUT we did it and it came out great! Think fruity, lightly sweet seltzer water.
When the grains arrived, we immediately put them in a quart jar with water, 1/4 cup of cane sugar (nothing fancy, just the table variety), a couple drops of molasses for mineral content, and a small handful of raisins.


We repeated this process every 48 hours for a COUPLE WEEKS until the grains had doubled in size and started to cause the liquid in the jar to be slightly bubbly and tangy.
If you receive regular Water Kefir grains (that aren't dehydrated) in the mail to start off with, this initial step should only take about 48 hours and shouldn't need to be repeated.
We put the entire contents of the jar (including the raisins and kefir grains) into a swingtop bottle and also added a handful of crushed strawberries for flavor.


I sent away for some water kefir grains on Amazon and they arrived... a little underwhelming. They were dehydrated and took a good 3 weeks to get going well enough to make "bubble juice". BUT we did it and it came out great! Think fruity, lightly sweet seltzer water.
When the grains arrived, we immediately put them in a quart jar with water, 1/4 cup of cane sugar (nothing fancy, just the table variety), a couple drops of molasses for mineral content, and a small handful of raisins.
 | ||||||
| Quinny helped. |
If you receive regular Water Kefir grains (that aren't dehydrated) in the mail to start off with, this initial step should only take about 48 hours and shouldn't need to be repeated.
 | |||
| WOOHOO! Finally bubbly and ready to go! |
Let it sit on the shelf at room temperature for 48 hours. Then chill, strain, and enjoy!!
Autumn,
Corn-Free,
Dairy-free,
Fermentation,
kimchi,
Lacto-fermentation,
Little Kids in the Kitchen,
Mason Jars,
probiotic,
Vegan,
Wheat-free
Baek (white) Kimchi: Vegan, mild, and all the probiotics of its spicy cousin.
9:38 AM
A while back I made a batch of Traditional Korean Kimchi. It came out beautiful and SUPER spicy. Like, definitely too spicy for the kids an me. My husband and one of our friends decided that it was best enjoyed on hotdogs and they devoured quite a bit of it that way. HAH! I think that it would also be really well suited to flavoring different things... Hot and Sour soup comes to mind.
I decided to do an Americanized version of White Kimchi in response to the SUPER-HEAT of the other variety. I wanted something more slightly spicey and mostly sour and I'm pretty sure this is going to hit it right on the head. Again, I switched up some of the traditional ingredients to include things that are easily accessed in most Grocery stores in the U.S.A.
Core and chop cabbage into small pieces. Put in a large bowl and sprinkle 1/3 cup of salt evenly between the leaves. Fill the bowl with enough water to submerge the leaves, and then weigh them down with a plate. Let sit on the counter for 24 hours.
Drain and rinse the cabbage lightly, retain about 1 cup of the brine.

Assemble some mason jars and lids (I had various sizes this time, my daughter helped and she was the one who picked them out of the cupboard). Wash the jars and caps thoroughly and set aside.
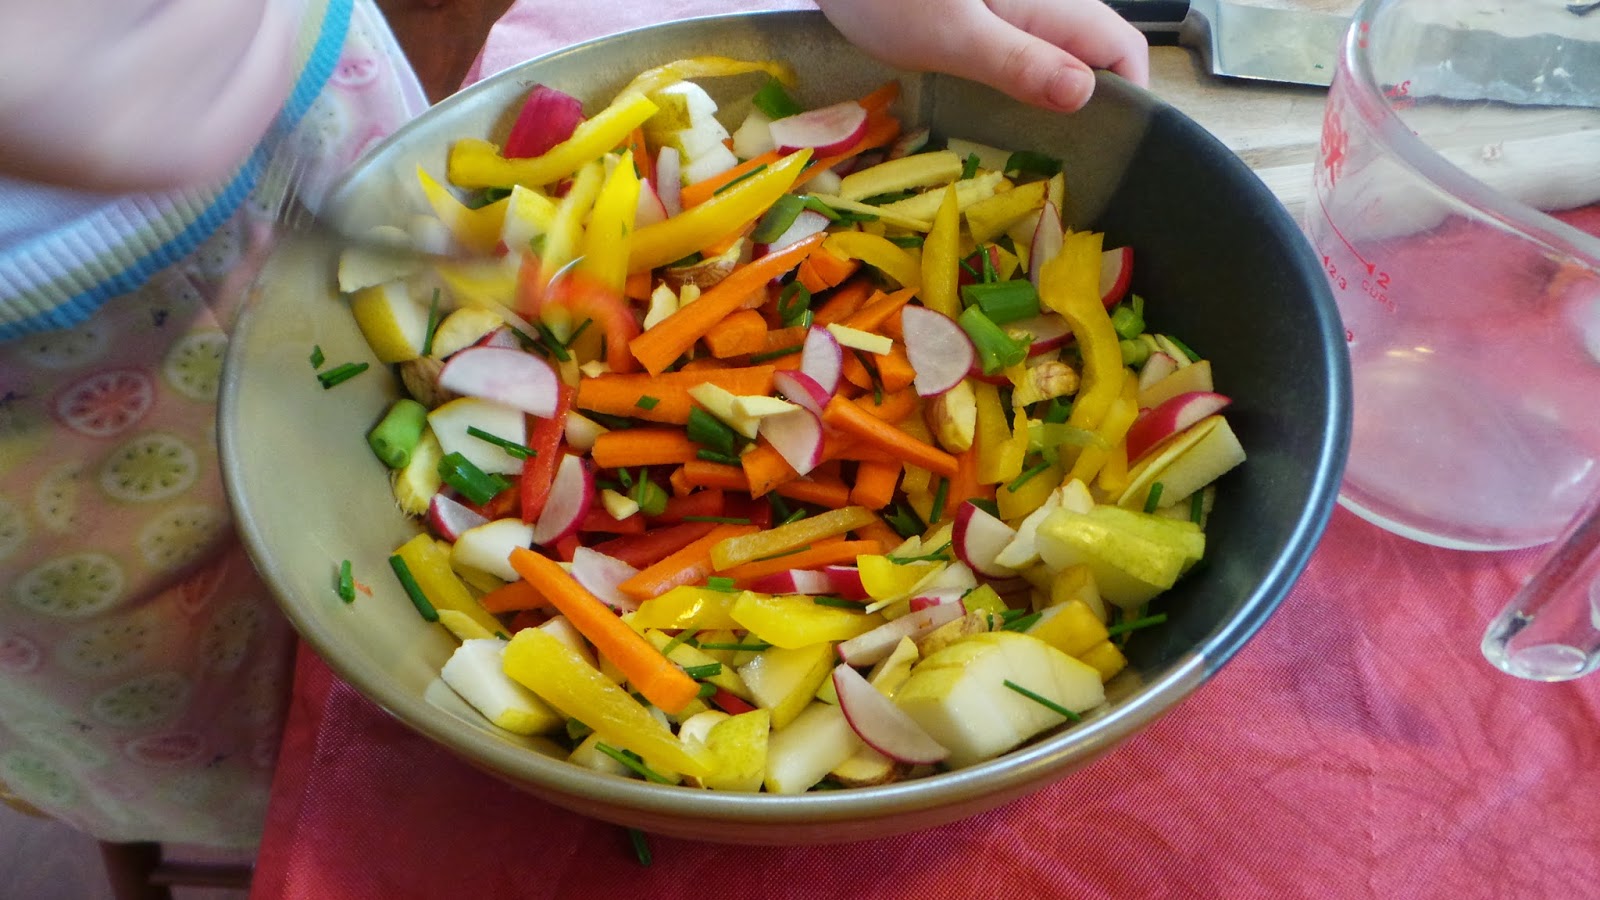
Prepare the remainder of your ingredients and toss them together in a large bowl.
Sprinkle 2 tbsp of salt on the veggie bowl and toss. Then add the veggies to the cabbage and toss again. Pack your veggie mixture hard into the mason jars ( I used a rolling pin) so that water starts to be extracted from the veggies. Top off the jars with enough brine to cover the veggies. Cover and seal with caps and rings.

Wait about 7 days before trying. And then transfer to the refridgerator. Eat it all right away, or wait until the sour "pickle" flavors develop further.
Enjoy!
I decided to do an Americanized version of White Kimchi in response to the SUPER-HEAT of the other variety. I wanted something more slightly spicey and mostly sour and I'm pretty sure this is going to hit it right on the head. Again, I switched up some of the traditional ingredients to include things that are easily accessed in most Grocery stores in the U.S.A.
Baek Kimchi
- 1 large nappa cabbage
- ⅓ cup, plus 2 tbsp kosher salt
- ½ bunch radishes, sliced
- 2 medium carrots cut into matchsticks
- 1 bunch chives, cut into 1 inch pieces
- 5 fresh chestnuts, peeled and cut into thin strips
- ½ of red bell pepper cut into thin strips
- 1 medium pear, peeled, cored and cut into matchsticks
- 4 garlic cloves
- 1 small onion, chopped
- 2 inches fresh ginger, peeled and chopped
Core and chop cabbage into small pieces. Put in a large bowl and sprinkle 1/3 cup of salt evenly between the leaves. Fill the bowl with enough water to submerge the leaves, and then weigh them down with a plate. Let sit on the counter for 24 hours.
Drain and rinse the cabbage lightly, retain about 1 cup of the brine.
Assemble some mason jars and lids (I had various sizes this time, my daughter helped and she was the one who picked them out of the cupboard). Wash the jars and caps thoroughly and set aside.
Prepare the remainder of your ingredients and toss them together in a large bowl.
 | ||
| Ani peeling a chestnut |
Sprinkle 2 tbsp of salt on the veggie bowl and toss. Then add the veggies to the cabbage and toss again. Pack your veggie mixture hard into the mason jars ( I used a rolling pin) so that water starts to be extracted from the veggies. Top off the jars with enough brine to cover the veggies. Cover and seal with caps and rings.
 | ||
| Fermentation station! |
Enjoy!
Autumn,
cabbage,
Corn-Free,
Dairy-free,
Diabetic friendly,
Fermentation,
Lacto-fermentation,
probiotic,
Sauerkraut,
Vegan,
Wheat-free
Old Fashioned Sauerkraut
5:49 PM
I took the plunge and made a batch of Sauerkraut. This was an intimidating project for me to take on because of some of the preconceived notions I had about traditionally fermented kraut. 1) that it would need a special crock that I didn't own and didn't have any practice using 2) that it would inevitably get moldy and gross like so many people complain about and 3) that I'd be too grossed out to eat it after the 6 week process was complete with all that skimming and the different "phases" of fermentation which can sometimes be more than a little off-putting.
I had read about how people make these huge 20 lb batches of kraut and *mostly* seal them and put them in a hole in the ground to ferment for weeks and about how Michael Pollan had a really hard time with mold infestation in his first (and only) 10lb batch.
Then cabbage came into season. And it was staring at me at the store. It was only $.69 a lb... and a relatively small one somehow made it into my cart and then into my refrigerator. And there it stood... staring at me... taking up a TON of room right there on the top shelf.
And so I gathered my tools, and my ingredients.
 First, core and chop up the cabbage, leaving the outer leaves intact.
Then combine all of the ingredients into a large mixing bowl and get out a wooden rolling pin to crush the cabbage/start the process of brine creation. The salt pulls the water out of the cabbage, so if you have a really fresh cabbage there's no need for added brine!

Stuff the shredded cabbage mixture into a quart jar, using the end of the rolling pin to really crush it down in there between handfuls. Then use the intact outer leaves to seal off any small pieces from the top of the brine. The key is that you DO NOT want any of the cabbage poking up above the brine or it WILL MOLD.

Allow the jar to sit at room temperature for 24 hours. By the end of that time, enough brine should have formed to completely cover the top cabbage leaf.
In my case, I had let the cabbage sit in the refrigerator for the couple days before starting my project. After 24 hours, my brine was about 3/4 of the way up the cabbage in the jar. I created some extra brine at a ratio of 1 tbsp seasalt to 1 quart of water and I topped the jar off.
 See? Nothing above the water line. I then decided to be extra careful and fit some wooden skewers across the top of the cabbage leaf (also completely submerged) to make sure that the bubbles coming up during fermentation don't push anything up above the waterline. This added precaution should completely eliminate the need to skim or otherwise mess with the ferment altogether.
Today is day 3 of my sauerkraut ferment and it is starting to actively bubble. I've had to "burp" the jar 3 times to decrease the pressure build up under the lid. I'm expecting another 2-3 days of this rapid bubbling variety of fermentation, and the rest of the process will take about 5 additional weeks (tasting at 3 and 4 weeks to check for desired flavor/consistency. I'm really excited to see how it turns out and have a good feeling about this batch. I'm really happy that I decided to employ my tried-and-true fermentation method of using small batches of vegetables in mason jars. This was a very fun and satisfying project.
Enjoy!
I had read about how people make these huge 20 lb batches of kraut and *mostly* seal them and put them in a hole in the ground to ferment for weeks and about how Michael Pollan had a really hard time with mold infestation in his first (and only) 10lb batch.
Then cabbage came into season. And it was staring at me at the store. It was only $.69 a lb... and a relatively small one somehow made it into my cart and then into my refrigerator. And there it stood... staring at me... taking up a TON of room right there on the top shelf.
And so I gathered my tools, and my ingredients.
Old Fashioned Sauerkraut
1 small cabbage, cored and sliced with outer leaves reserved
1-2 tbsp kosher salt (to taste)
1 head garlic, peeled and crushed
caraway seeds
Juniper berries (if you have them, which I did not)
 | ||||
| This was about 1.5 lbs of cabbage once it was chopped/cored |
Stuff the shredded cabbage mixture into a quart jar, using the end of the rolling pin to really crush it down in there between handfuls. Then use the intact outer leaves to seal off any small pieces from the top of the brine. The key is that you DO NOT want any of the cabbage poking up above the brine or it WILL MOLD.
Allow the jar to sit at room temperature for 24 hours. By the end of that time, enough brine should have formed to completely cover the top cabbage leaf.
In my case, I had let the cabbage sit in the refrigerator for the couple days before starting my project. After 24 hours, my brine was about 3/4 of the way up the cabbage in the jar. I created some extra brine at a ratio of 1 tbsp seasalt to 1 quart of water and I topped the jar off.
Today is day 3 of my sauerkraut ferment and it is starting to actively bubble. I've had to "burp" the jar 3 times to decrease the pressure build up under the lid. I'm expecting another 2-3 days of this rapid bubbling variety of fermentation, and the rest of the process will take about 5 additional weeks (tasting at 3 and 4 weeks to check for desired flavor/consistency. I'm really excited to see how it turns out and have a good feeling about this batch. I'm really happy that I decided to employ my tried-and-true fermentation method of using small batches of vegetables in mason jars. This was a very fun and satisfying project.
Enjoy!
canning,
Corn-Free,
Dairy-free,
Diabetic friendly,
Dill pickles,
Fermentation,
Lacto-fermentation,
Mason Jars,
pickles,
probiotic,
slow food,
Summer,
Vegan,
Wild yeast
Lacto-Fermentation project: Old Fashion Dill Pickles
11:19 AM
YUM! boy were these good, too bad I only made 2 quarts! I make pickles a few different ways, as you probably noticed from the Zucchini Pickle post, I make sweet "cooked" style pickles, as well as the vinegary, tangy refridgerator version (which I'll be making in the next couple of days and posting very soon after). But before there were refrigerators, and easily obtained mass quantities of vinegar, there was brine and lacto-fermentation. Lacto-fermented pickles are sour, and salty, and delicious and FULL of probiotic goodness. You can make them with pretty much any spice and veggie combination you'd like. I made mine out of whole pickling cucumbers with garlic, and dill as the main flavors.
The first thing you need is a couple quart-sized wide mouth mason jars, with resealable caps. Such caps can be ordered online fairly cheaply from here.
Then you'll need an airlock with a rubber stopper to seal up the hole in the resealable cap, so that air can escape during the fermentation process.
 | ||
| Jars are pictured in back of the ingredients |
Old Fashioned Lacto-fermented Dill Pickles
makes 2 quarts
10-12 pickling sized cucumbers
2 oz kosher salt (or Seasalt)
2 quarts water
2 garlic scapes chopped up (or 6-8 cloves of garlic)
2 tsp black peppercorns
2 tsp dill seeds
fresh dill leaves/flowers to taste
Clean mason jars and caps with hot soapy water and let drip dry.
Combine salt, water peppercorns, and dill seeds in a large pot, heat and stir until the salt is completely dissolved. No need to boil, but DO allow the brine to cool completely.
While waiting for the brine to cool, stuff the mason jars with cucumbers, dill leaves and flowers and garlic.
Pour the brine over the veggies in the mason jars, cap and seal with airlock. Leave them out on the counter for a couple days, until the brine starts to cloud up a little. Then put them in a cool dry place (our basement is actually perfect for this) for another 5-7 days and let the spontaneous fermentation magic happen! After those days have passed, test them out! They should taste sour and salty, and slightly carbonated. If the sour isn't there yet and all you get is a lot of brine with garlic and dill in the background, let it ferment for a few days longer and see what happens.
My kids and I loved these, but my husband did not. I'd say 3 out of 4 isn't bad!
Enjoy and happy fermenting!


