




Crostata,
CSA,
Dairy-free,
Festival/Special Occasion Menu,
Heirloom Vegetables,
Little Kids in the Kitchen,
Organic,
slow food,
Summer,
tomatoes,
Vegan,
Whole grain
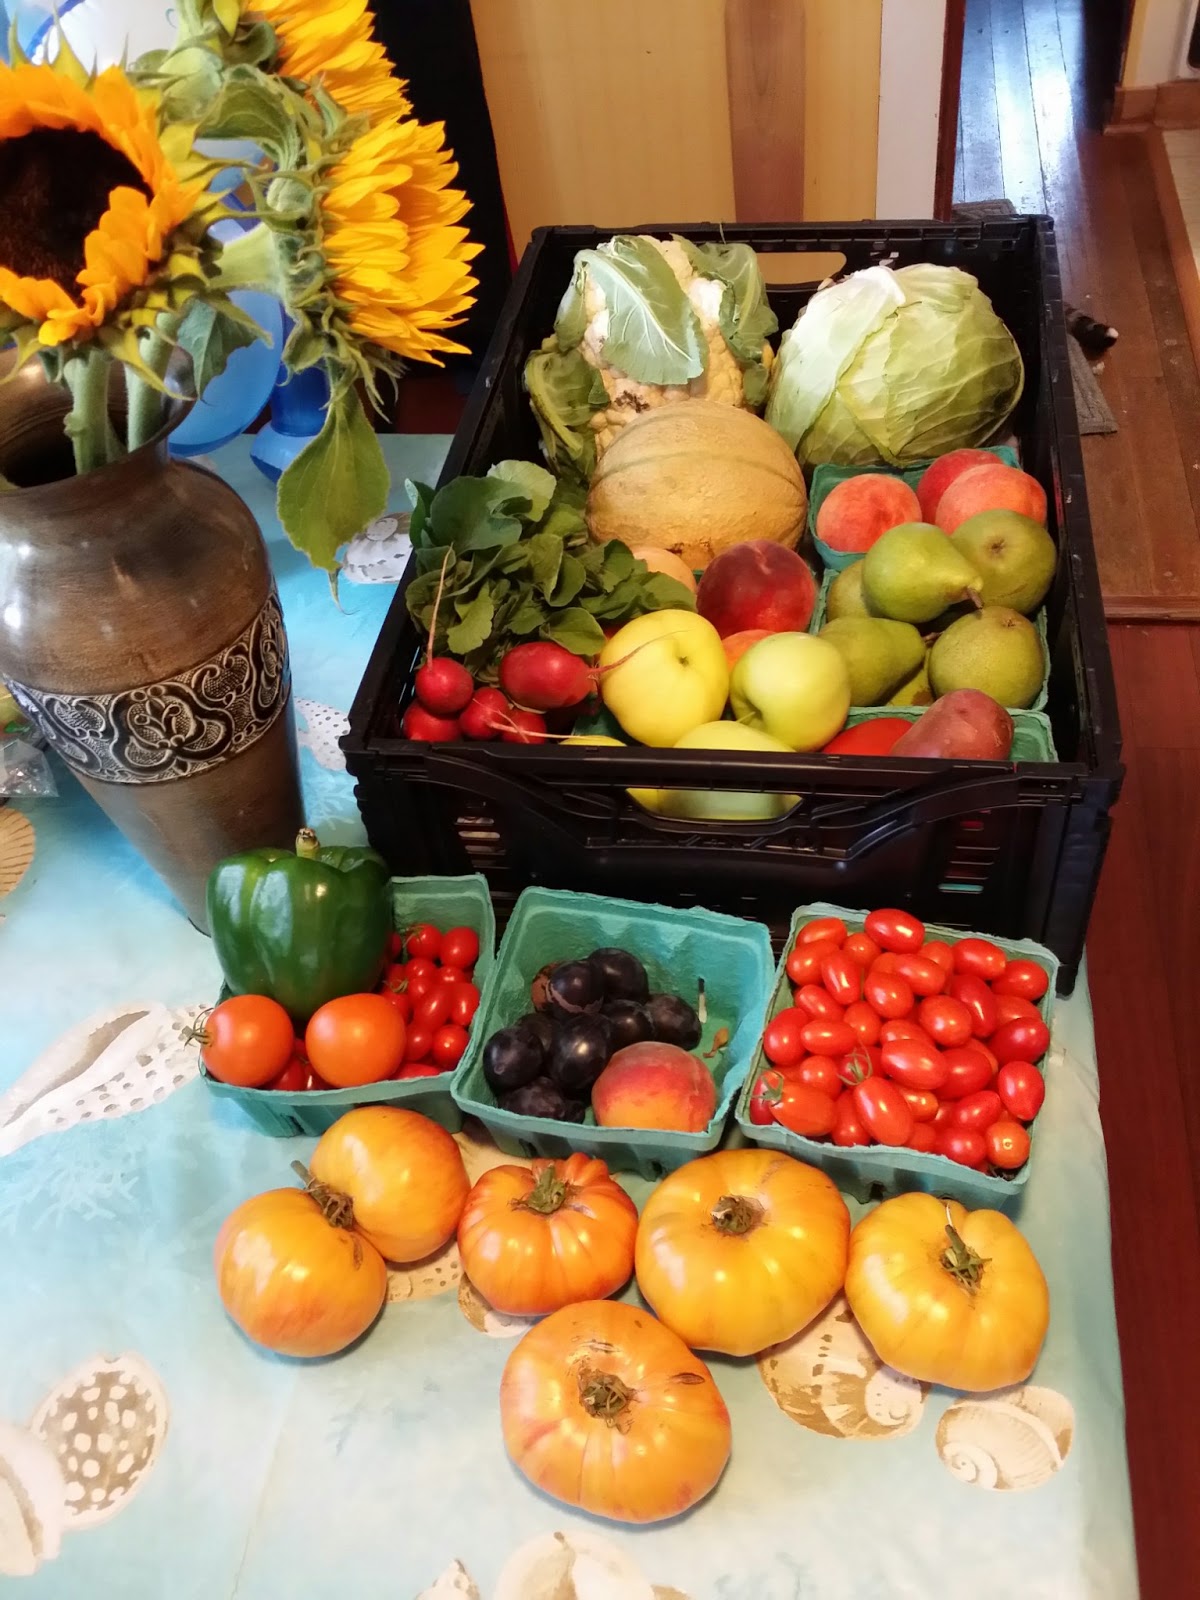
Full CSA Share Weeks 8 and 9: HERE COME THE HEIRLOOM TOMATOES! Whole Wheat Heirloom Tomato Crostata
9:55 AM
Ok. I've been slacking in writing about this stuff. We've also been traveling a bit and it's been fantastic.
The last 2 weeks have been populated by peaches, plums, apples, melon, and blueberries. All of which we ate raw and at once. I actually supplemented our fruit supply with storebought fruit as well. Just leave it on the table and it disappears.
We made raw salads out of the lettuce, and cucumbers and green beans during week 8.
The leeks (3) and red potatoes and onion were used in a version of Manhattan Clam Chowder.
I modified the recipe to contain Leeks, canned clams and juice (I KNOW! it was a weeknight!) and 3 or 4 HUGE heirloom tomatoes (more about those in a moment).

I also made another batch of Borscht out of the beets and grilled up the japanese eggplants and broccoli.
So guys. Here's the thing: I'm finding that I'm happiest when I supplement my CSA share! "Using it up" as a family of 4 has never once proven to be the challenge that I was hoping for. Don't get me wrong. I LOVE the idea behind a CSA membership and being surprised each week with a variety of produce, but it just isn't enough to keep me inspired. I'll keep updating with photos of the CSA hauls for the rest of the season, but I'm thinking most of my inspiration will be coming from elsewhere...
And with that: I was feeling uninspired. Didn't want to cook the same old stuff. Didn't want to write about it.
Then Mom went on vacation and let me loose in her garden... I came home with this:
 HEIRLOOM TOMATO GLUT!! And fresh herbs and carrots and onions and cucumbers and flowers.
THIS is what I'm talking about.
I immediately responded with a tomato/basil/cucumber salad with a simple balsamic vinaigrette. It was amazing in a way that only fresh heirloom tomatoes can be:

To go along with the clam chowder (or so I told myself, Actually this could be a meal unto itself) I made a Crostata out of heirloom tomatoes, fresh sage, parsley and basil, and fresh picked caramalized onions.


 |
| Full CSA Share Week 8 |
 |
| Full CSA Share Week 9 |
We made raw salads out of the lettuce, and cucumbers and green beans during week 8.
The leeks (3) and red potatoes and onion were used in a version of Manhattan Clam Chowder.
I modified the recipe to contain Leeks, canned clams and juice (I KNOW! it was a weeknight!) and 3 or 4 HUGE heirloom tomatoes (more about those in a moment).

I also made another batch of Borscht out of the beets and grilled up the japanese eggplants and broccoli.
So guys. Here's the thing: I'm finding that I'm happiest when I supplement my CSA share! "Using it up" as a family of 4 has never once proven to be the challenge that I was hoping for. Don't get me wrong. I LOVE the idea behind a CSA membership and being surprised each week with a variety of produce, but it just isn't enough to keep me inspired. I'll keep updating with photos of the CSA hauls for the rest of the season, but I'm thinking most of my inspiration will be coming from elsewhere...
And with that: I was feeling uninspired. Didn't want to cook the same old stuff. Didn't want to write about it.
Then Mom went on vacation and let me loose in her garden... I came home with this:

THIS is what I'm talking about.
I immediately responded with a tomato/basil/cucumber salad with a simple balsamic vinaigrette. It was amazing in a way that only fresh heirloom tomatoes can be:

To go along with the clam chowder (or so I told myself, Actually this could be a meal unto itself) I made a Crostata out of heirloom tomatoes, fresh sage, parsley and basil, and fresh picked caramalized onions.
 | ||||
| These ingredients were actually enough for 2 Crostata! |
Whole Wheat Vegan Heirloom Tomato and Onion Crostata
about 20 small heirloom tomatoes
2 cloves of garlic, minced
1 bunch of flatleaf parsley
1 tbsp chopped fresh basil
2 leaves chopped fresh sage
1 medium onion, sliced and caramalized
Daiya Cheddar shreds (optional)
Crust
1 cup whole wheat flour
4 tbsp Extra Virgin Olive Oil
1 pinch salt
1/4 cup water
Semolina flour for dusting
Slice onion and caramalize it in a pan with about 2 tbsp of olive oil. Cook on low for 8-10 minutes until onion is wilted and light brown in color. Set aside.
Preheat oven to 425f.
Put together the crust and then roll it out with a rolling pin On a surface that has been heavily dusted with Semolina Flour (I actually ended up using 2 crusts with this amount of veggies!). Spread the onions, oil and sliced herbs and garlic on the crust, then place the tomatoes on top and turn up the sides of the crust to prevent any of the goodness from leaking out.

I then topped this off with some shredded Daiya Cheddar cheese and a tiny sprinkle of seasalt and the remainder of the chopped herbs.

Bake in the oven for 15 minutes, take out, let cool a bit, and enjoy!!

Apples,
Autumn,
black berries,
Corn-Free,
crabapples,
Dairy-free,
Festival/Special Occasion Menu,
foraging,
Herbal Remedies,
tomatoes
Autumn Equinox Weed Walk and Kitchen Update
12:38 PM
It's the equinox and from here on out the days will be shorter than
the nights here in the northern hemisphere. The weather has turned
cooler and the leaves are starting to change color. Everything that is
going to set fruit this season is doing so and herbs and flowers for
winter remedies abound. This is going to be a photo roundup of what
we've been doing and seeing around here lately.
Hope you enjoy!

Hope you enjoy!
Autumn,
Corn-Free,
Dairy-free,
Diabetic friendly,
from scratch,
slow food,
soup,
tomatoes,
Vegan
Upstate NY Gazpacho: The weather turns before the harvest ends
12:36 PM
In my continuing effort to proceed with the tomato theme, I put Gazpacho on my list of things to create last week. We had all the ingredients on hand, ready to go and as I started chopping and stirring and measuring I realized 2 things: 1) I wanted protein in my "soup"... so I added garbanzo beans and 2) It was 40 degrees and raining outside. I wanted HOT soup.

Autumn,
Corn-Free,
Dairy-free,
Diabetic friendly,
from scratch,
slow food,
Summer,
tomatoes
Something A Little Different: Tomato Pie
12:31 PM
When I finished with the Marinara sauce, I still had about 3 quarts of tomatoes left. What to do? We already tried crostata, but what about pie??
So, we took the crust recipe used in the crostata, and filled it with tomato pie ingredients this time around. It was pretty darn amazing! Savory, salty and sweet it's perfect for brunch or an afternoon snack

So, we took the crust recipe used in the crostata, and filled it with tomato pie ingredients this time around. It was pretty darn amazing! Savory, salty and sweet it's perfect for brunch or an afternoon snack
- 1 9-inch pie shell (we used the crostata crust recipe)
- 1/2 sweet onion, chopped
- 3 medium tomatoes, cut in half horizontally, squeezed to remove excess juice, roughly chopped, to yield approximately 3 cups chopped tomatoes
- a palmful of basil (dried)
- 2 cups shredded Daiya "Pepperjack" cheese (Or Daiya cheddar would work too)
- 3/4 cup mayonnaise *see note*
- Salt and freshly ground black pepper
Preheat your oven to 350°F. Pre-bake the pie shell in the oven for 12 to 15 minutes or until lightly
browned.
Lightly salt the chopped tomatoes and set them in a colander over a bowl to drain while you are pre-baking the crust. Squeeze as much moisture as you can out of the chopped tomatoes. A potato ricer works fantastically for this task, but paper towels or a kitchen towel would work in a pinch.
Sprinkle a layer of chopped onion over the bottom of your pre-baked pie crust shell. Spread the drained chopped tomatoes over the onions. Sprinkle the basil over the tomatoes.
In a medium bowl, mix together the grated cheese, mayonnaise (and breadcrumbs!) with a sprinkling of salt and freshly ground black pepper. The mixture should form into a ball. Spread the cheese mixture over the tomatoes.
 Place in the oven and bake for 25-45 minutes, or until the cheese topping becomes brown and bubbly.


Lightly salt the chopped tomatoes and set them in a colander over a bowl to drain while you are pre-baking the crust. Squeeze as much moisture as you can out of the chopped tomatoes. A potato ricer works fantastically for this task, but paper towels or a kitchen towel would work in a pinch.
Sprinkle a layer of chopped onion over the bottom of your pre-baked pie crust shell. Spread the drained chopped tomatoes over the onions. Sprinkle the basil over the tomatoes.
In a medium bowl, mix together the grated cheese, mayonnaise (and breadcrumbs!) with a sprinkling of salt and freshly ground black pepper. The mixture should form into a ball. Spread the cheese mixture over the tomatoes.
Let set 20 minutes and enjoy it warm, or pop it in the refridgerator and let it cool off. It's delicious either way and even better the next day!
Autumn,
canning,
Corn-Free,
Dairy-free,
from scratch,
Marinara,
slow food,
Summer,
tomatoes,
Wheat-free
DIY Marinara sauce, from farmstand to quart containers
12:26 PM
As I said in my last post, I took a trip to our friendly neighborhood farmstand and picked up A LOT of tomatoes!

And some local garlic and onions. So, there was only one logical direction this could go:


And some local garlic and onions. So, there was only one logical direction this could go:
Farmfresh Marinara Sauce
about 6 quarts roma tomatoes: seeded, cored, and diced
2 small heads of garlic minced
1 sweet onion chopped
1 bunch of fresh basil, chopped leaves only (or a palmful of dried basil)
Put all of the ingredients into a large crockpot. Cook on low setting for about 12 hours, stirring occasionally.
Put in a large bowl and beat with a whisk until desired "chunkiness" is reached.
Serve and enjoy, OR
Can it!
You'll need 3 quart-sized mason jars with self-sealing lids, a large (2 gallon) pot and water.
While you bring the water to a boil, ladle the marinara from the bowl into the mason jars. Screw down the lids tight.
When the waterbath is at a full rolling boil, submerge the 3 quart jars up to their necks in water. Keep these jars at a rolling boil for 40 minutes.
Remove the jars from the water and set them aside on a kitchen towel on the counter. Wait for them to cool. The caps will "pop" shut when sealed and the sauce should keep on the shelf for up to a year (although, I strongly doubt they'll be there that long in our house). This is what I LOVE about doing small batches: They're manageable to store and unintimidating to process, requiring very little special equipment.
Enjoy!!
Autumn,
Corn-Free,
Crostata,
Dairy-free,
Festival/Special Occasion Menu,
from scratch,
harvest,
slow food,
Summer,
summer squash,
tomatoes,
Vegan,
Zucchini
A Little Inspiration From a Friend: "Modified" Tomato-Zucchini Crostata
12:43 PM
I admit it, the last couple of weeks I've been pretty rudderless. No inspiration or creative energy what-so-ever... and I was crabby about it too. Then, Hubby made this beautiful Crostata dish he saw on a friend's blog... and I was finally inspired to go out there and get some gorgeous ingredients for MORE stuff!

The last few days I've been busy in the kitchen chopping and preserving and simmering. And I've also been making a bunch of artwork to go along with the book I'm writing (Mostly stories and recipes from here, and it'll be available in a few months both through Amazon and on my main page).
So, here's to a sudden burst of activity, and a YUMMY new recipe!

Using an electric mixer with a paddle attachment, mix the flour and salt and thyme. Then, add the margarine and mix until it is the consistency of coarse cornmeal. Add cold water until the dough begins to pull away from the sides of the bowl, then remove and form into a ball and wrap in foil. Refrigerate for at least 2 hours.
In a medium skillet, heat the oil over medium heat. Sauté the onion, zucchini and summer squash, and sprinkle with garlic, salt and pepper. Cook for about 4 minutes on each side, then set aside.
Working on a well-floured surface, roll out the dough into a circle about 15 inches in diameter. Then place the dough on a parchment-lined baking sheet.


The last few days I've been busy in the kitchen chopping and preserving and simmering. And I've also been making a bunch of artwork to go along with the book I'm writing (Mostly stories and recipes from here, and it'll be available in a few months both through Amazon and on my main page).
So, here's to a sudden burst of activity, and a YUMMY new recipe!
Nell's Tomato-Zucchini Crostata
Modified from this recipe
Pastry:
2 cups Whole Wheat Flour
1 Pinch Seasalt
1 Tablespoon chopped thyme
1 ½ sticks Margarine (I use Nature's Balance brand), chilled and cut into cubes
About ⅓ cup cold water
2 cups Whole Wheat Flour
1 Pinch Seasalt
1 Tablespoon chopped thyme
1 ½ sticks Margarine (I use Nature's Balance brand), chilled and cut into cubes
About ⅓ cup cold water
Crostata:
1 ½ Tablespoon olive oil
1 small onion, thinly sliced
1 small zucchini, sliced into long strips
1 small yellow summer squash, sliced into long strips
1 clove garlic, thinly sliced
Seasalt to taste
1 ½ Tablespoon olive oil
1 small onion, thinly sliced
1 small zucchini, sliced into long strips
1 small yellow summer squash, sliced into long strips
1 clove garlic, thinly sliced
Seasalt to taste
fresh ground black pepper to taste
¼ cup pesto
4 small ripe tomatoes, thinly sliced
3 ounces Daiya cheddar shreds
Fresh basil leaves, thinly sliced
4 small ripe tomatoes, thinly sliced
3 ounces Daiya cheddar shreds
Fresh basil leaves, thinly sliced
Using an electric mixer with a paddle attachment, mix the flour and salt and thyme. Then, add the margarine and mix until it is the consistency of coarse cornmeal. Add cold water until the dough begins to pull away from the sides of the bowl, then remove and form into a ball and wrap in foil. Refrigerate for at least 2 hours.
In a medium skillet, heat the oil over medium heat. Sauté the onion, zucchini and summer squash, and sprinkle with garlic, salt and pepper. Cook for about 4 minutes on each side, then set aside.
Working on a well-floured surface, roll out the dough into a circle about 15 inches in diameter. Then place the dough on a parchment-lined baking sheet.
Rub the bottom
of the pastry with pesto. Arrange the squash slices in a circle with the
thinnest part of the squash facing in, closest to the center. Leave a 1 to 2
inch border around the outside of the pastry with no filling. Top with the
tomatoes slices, Daiya, and basil. Drape the pastry into the center and refrigerate for
at least 30 minutes.
Preheat the oven to 425 degrees.
Bake on the middle shelf for 25 to 30 minutes, or until the pastry is golden brown and the cheese is bubbling.
Preheat the oven to 425 degrees.
Bake on the middle shelf for 25 to 30 minutes, or until the pastry is golden brown and the cheese is bubbling.
Hope you enjoy this as much as we did! Thanks Nell!
basil,
Corn-Free,
Dairy-free,
Diabetic friendly,
eggplant,
grill,
Summer,
tomatoes,
Vegan,
whole food
Grilled Eggplant with Tomatoes and Fresh basil
12:43 PM
There's no better way to showcase and enjoy garden fresh veggies than doing it simply and letting the flavors speak for themselves. It doesn't get much more straightforward than this recipe that combines the unmistakable flavor of garden fresh tomatoes and basil with a satisfying slab of eggplant. Grilled to perfection outdoors to keep the heat out of the kitchen.

Grilled Eggplant with Garden Tomatoes and Fresh Basil
2 medium eggplants, sliced lengthwise
2 medium tomatoes, sliced
1 bunch of fresh basil
Olive oil
Seasalt to taste
Black pepper to taste
Balsamic vinegar to taste
Slice eggplant and put it in a large bowl of salted water for 10-15 minutes to remove any bitter flavor. Pat dry each individual piece, and assemble slabs on a "tray" made of heavy duty aluminium foil. Add tomato slices on top of eggplant. Top with basil, seasalt, pepper, a drizzle of olive oil, and a drizzle of balsamic vinegar.
Place the tray on a grill and grill on medium heat until the eggplant is fork tender. Serve and enjoy!

bacon,
canning,
Corn-Free,
Cucumbers,
Dairy-free,
Diabetic friendly,
Dill pickles,
from scratch,
Large cucumbers,
Little Kids in the Kitchen,
New Onion,
Overripe cucumbers,
Paleo,
pickles,
Refrigerator Pickles,
slow food,
Summer,
sweet pickles,
tomatoes,
whole food
Everything's coming up cucumbers! They're finally here and we're keeping up with Dill refrigerator pickles, Geschmorte Gurken (Braised Cucumbers) and Classic Sweet "Bread And Butter" style pickles
1:14 PM
Cucumbers have been making their way into our kitchen by the bagful and I'm loving every second of it. Over the last week, I've made another double batch of lacto-fermented dills, and a couple quarts of beautiful tiny refrigerator dills (actually, my youngest daughter played a big part in putting these together). One of the bags of cukes that we got were overripe and HUGE. I chopped 4 of them up and made traditional style sweet (bread and butter) pickles, and tried my hand at yet another recipe passed down from Oma. "Geschmorte Gurken" is a braised stuffed cucumber recipe where you hollow out the seeds and use the cukes as little bowls to stuff with savory (Paleo-friendly!) filling. And we still have more cukes so we aren't quite done yet!
Lets start with a little project I did with my 2-year-old daughter while her sister was at camp. She was so excited to help (EAT) the little cucumbers that I had gotten specifically for pickling that I thought it was wise to just let her immerse herself in the process. She did great and now we have 2 quarts of beautiful refrigerator dills to snack on.
Quinn's Refrigerator Dill Pickles
2 quarts small cucumbers (we used cornichon sized small gherkins)
3 1/2 cups water
1 1/4 cups white vinegar (or apple cider vinegar to be 100% corn-free)
1 tbsp sugar
1tbsp seasalt
2 garlic scapes, chopped
4 dill flowers or 2 bunches of dill leaves to taste.
Stir water,
vinegar, sugar, and sea salt together in a large bowl until all ingredients are dissolved. I found that it wasn't necessary to bring this to a boil (which is always great when you have a 2-year-old helping).


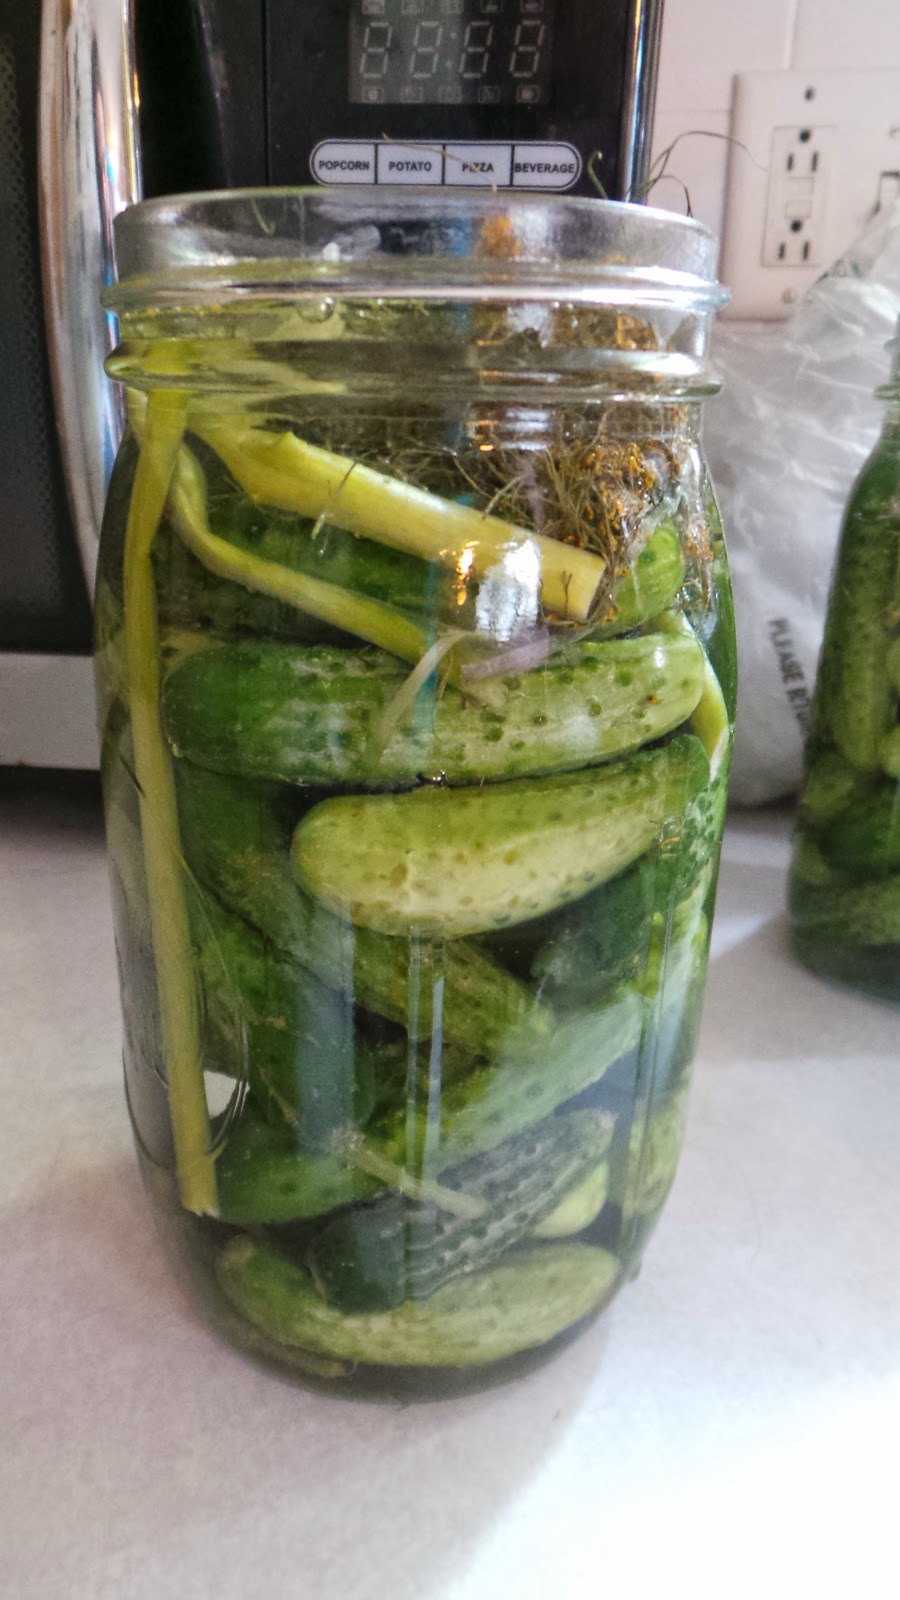
Combine
cucumbers, garlic scapes (or cloves), and fresh dill in a large glass or
plastic container. Pour vinegar mixture over cucumber mixture.
Seal container with lid and refrigerate for at least 3 days.
Enjoy!


Going from tiny gherkins to overgrown/almost forgotten cukes from the garden is quite a leap and we made the leap this weekend.

I had never even heard of this recipe before this week, but Oma swore by it, and Mom found the hand typed recipe card in her collection... so I decided to give it a whirl.

I'm glad that I did because what a unique, gorgeous seasonal treat these were!
I had more cucumbers than what the recipe calls for, so next time around I'm planning on using Quinoa along with the other stuffing ingredients to bulk it up and give it a little extra protein, which would make these a meal in themselves.
Ur Oma's Geschmorte Gurken (Braised Cucumbers)
1-2 large cucumbers
1-2 tomatoes
3 oz bacon
1 onion, chopped
1 cup water (if needed)
salt to taste
2-3 cloves garlic, chopped
1 pinch sugar
Parsley or Dill to taste
Peel, cut in half lengthwise, and hollow-out cucumber. Set aside.

Skin and de-seed the tomatoes, and set aside.
Fry bacon in the pan until crispy and reserve the fat. Saute the onion in the fat until it is translucent. Add a little water if needed. Add the tomatoes, salt, sugar, garlic, and herbs. Put the halved cucumbers in as well.

Cover until the cucumbers are fork tender.
Pull the cucumber "bowls" out and put them on a serving plate. Fill them with the tomato mixture and top them with crispy bacon.

We had Geschmorte Gurken as part of our Sunday dinner this week. And when Monday came, I found myself with a little bit of time to myself... and yet another bag of cucumbers awaiting attention. I decided that, as wonderful as lacto and refrigerator pickles are, they have a relatively short shelf life and take up a bunch of space in my refrigerator. It was time to make something a bit more flexible as far as shelf-life is concerned. So, I made classic sweet bread and butter style pickles.
Sweet "Bread and Butter Style" Pickles
4 cups
apple cider vinegar
1/2 cup
salt
4 cups
white sugar
1 teaspoon
ground turmeric
2 teaspoons
mustard seed
4 large cucumbers, sliced
1 onion chopped
In a saucepan at medium-high heat, combine cider vinegar, salt, sugar,
tumeric and mustard seed. Bring to a boil and let cook for 5
minutes.
Meanwhile,
slice cucumbers and onion. Loosely pack the vegetables into 4, 1-quart
canning jars.

Pour hot liquid over the
vegetables in the containers. Put on lids and rings and process in a waterbath for 5 minutes. Remove from water and let cool and seal on the counter. Should keep for up to 1 year on the shelf.

Hope you enjoy all of these as much as we are!
Happy Harvest!


